Best IG Export Settings for Lightroom
I’m often asked, ‘How do I get my photos to look their best on IG?’. The answer is to optimize your images for Instagram by exporting them at the maximum resolution that Instagram will accept. In this BLOG I’ll show you how to do that and show you how to create an export preset so anytime you want to export for IG it’ll be as easy as a click of a few buttons. Let’s dive in!
After you’ve shot your images, imported them into Lightroom and edited them, now it’s time to export them for posting to Instagram. Here’s a step-by-step run through on how to optimize and export for Instagram.
Step 1: In order to fill up the most space on viewer’s phones when they’re scrolling through IG you’ll want to post a vertical image with a 4x5 crop. For this photo I’m going to click the crop tool (R on your keyboard), then I’ll click original and scroll down to 4x5. Then I’ll grab a corner and drag the cropping tool to my desired shape. Then click R on your keyboard to save changes, or click Done. Next I’ll right click and press export.

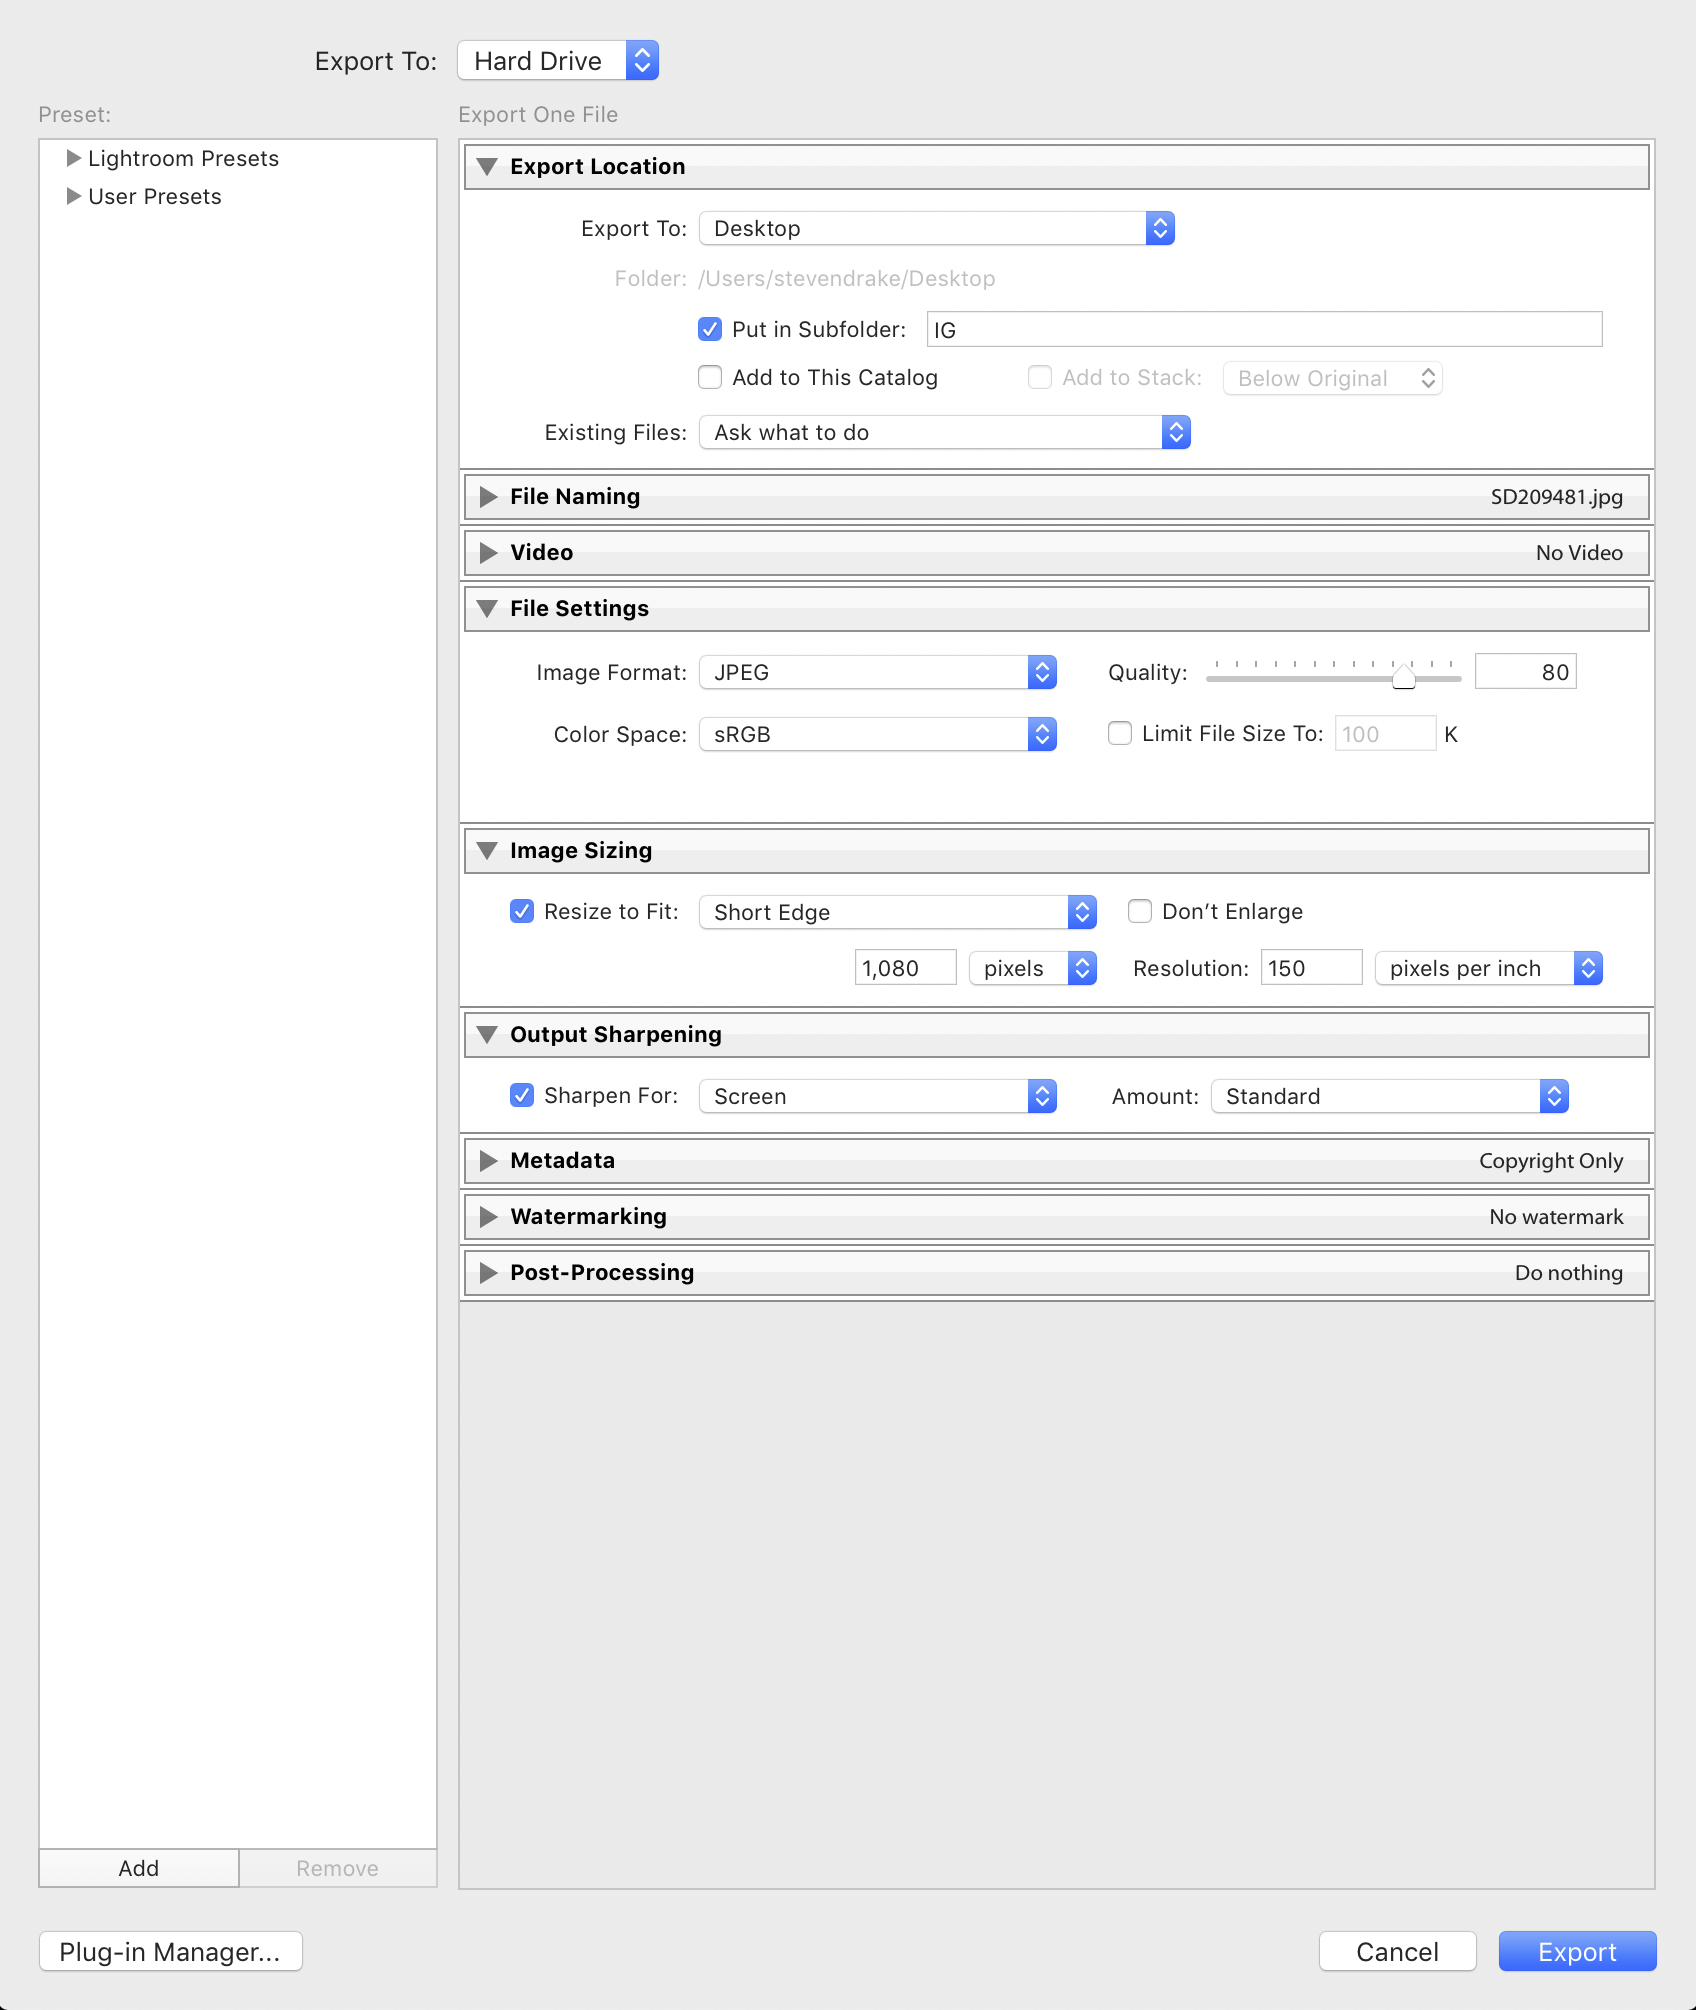
Step 2: An export dialog window will appear. Under Export Location I export to my Desktop into a subfolder labeled IG. Under file settings I’ll export as a JPEG with sRGB as my color space. I’ll set my quality to 80. Under Image Sizing I’ll set my short edge to 1080 pixels (this is the maximum width of an image that can be viewed on Instagram. Anything large and Instagram will down-res the image which reduces picture quality) I’ll then set my resolution to 150 ppi. Then under output sharpening I’ll sharpen for screen and use standard sharpening. Refer to Instagrams FAQ page for more details on best export settings. BEFORE you press export, you’ll want to create a User Preset of this export setting so that every time you want to export for IG, you can access these saved settings. Refer to Step 3:
Step 3: Create a user preset by clicking the arrow next to ‘user preset’ in the top right of the export dialog screen. From here click the ‘Add’ button in the bottom left. I’ll name this one 2020 IG Export. Now every time I go to export a photo for Instagram I’ll simply click ‘2020 IG Export’ in the export dialog box and those settings will be used!


Step 4: Click ‘Export’! Now it’s time to post to Instagram. There’s a few ways to do this. Option 1 is to click into the folder you’ve created on your desktop, then airdrop the image to your iPhone (if you have an iPhone) then post from your phone. Option 2 is to send the photo, caption and hashtags to yourself in an email, save the the image to your phone from the email then post it to IG, along with the copy and pasted caption and hashtags. Option 3 is to upload to an Instagram scheduling service like Sked Social. For saving time and being as efficient as possible I prefer to use Sked Social.

I hope this how-to helps you out and makes you more efficient with your work flow and also helps you to share your best work with the world!
-Steven